Step 2
Add Some Keyframes
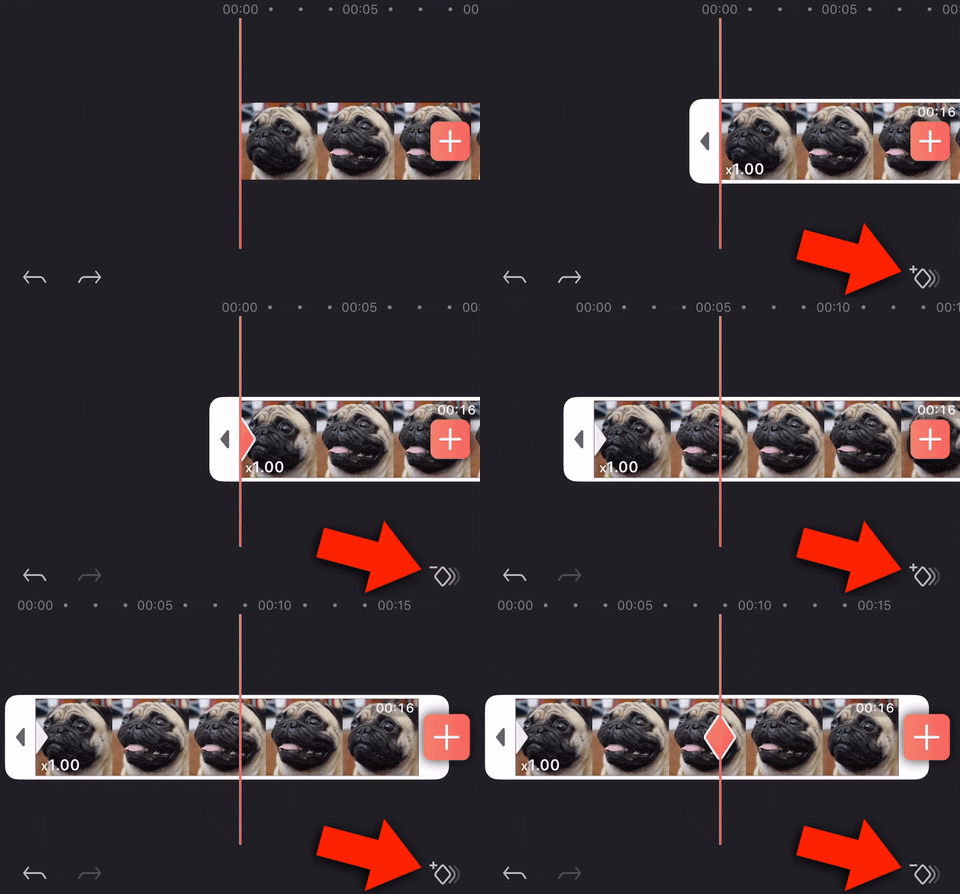
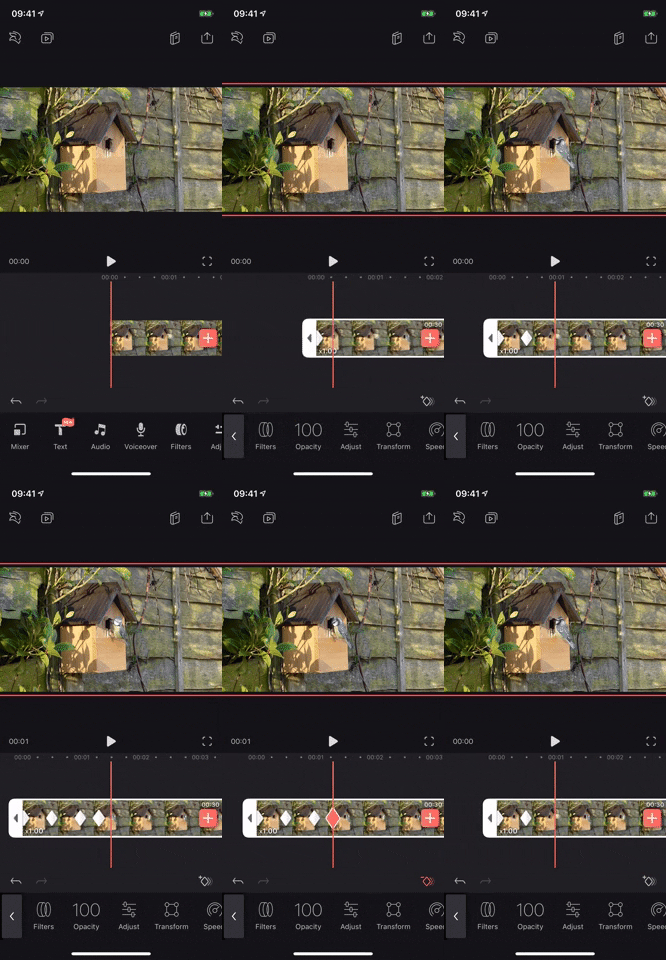
Before we get into what keyframes can do for you in regards to animations and effects, you need to know where the keyframe icon is and how to add and erase keyframes from your project. Start by tapping on a clip or effect in your project, which will change options in the bottom toolbar. Above the toolbars on the right, you'll see a diamond icon with a plus sign above it — that's the keyframe tool.
Tap on the keyframe tool to add a keyframe marker to your clip. You just made your first keyframe, which tells the app you want the video, audio, or photo to have the same settings it has already up until the specified time. It will also be the start of your animation or change.
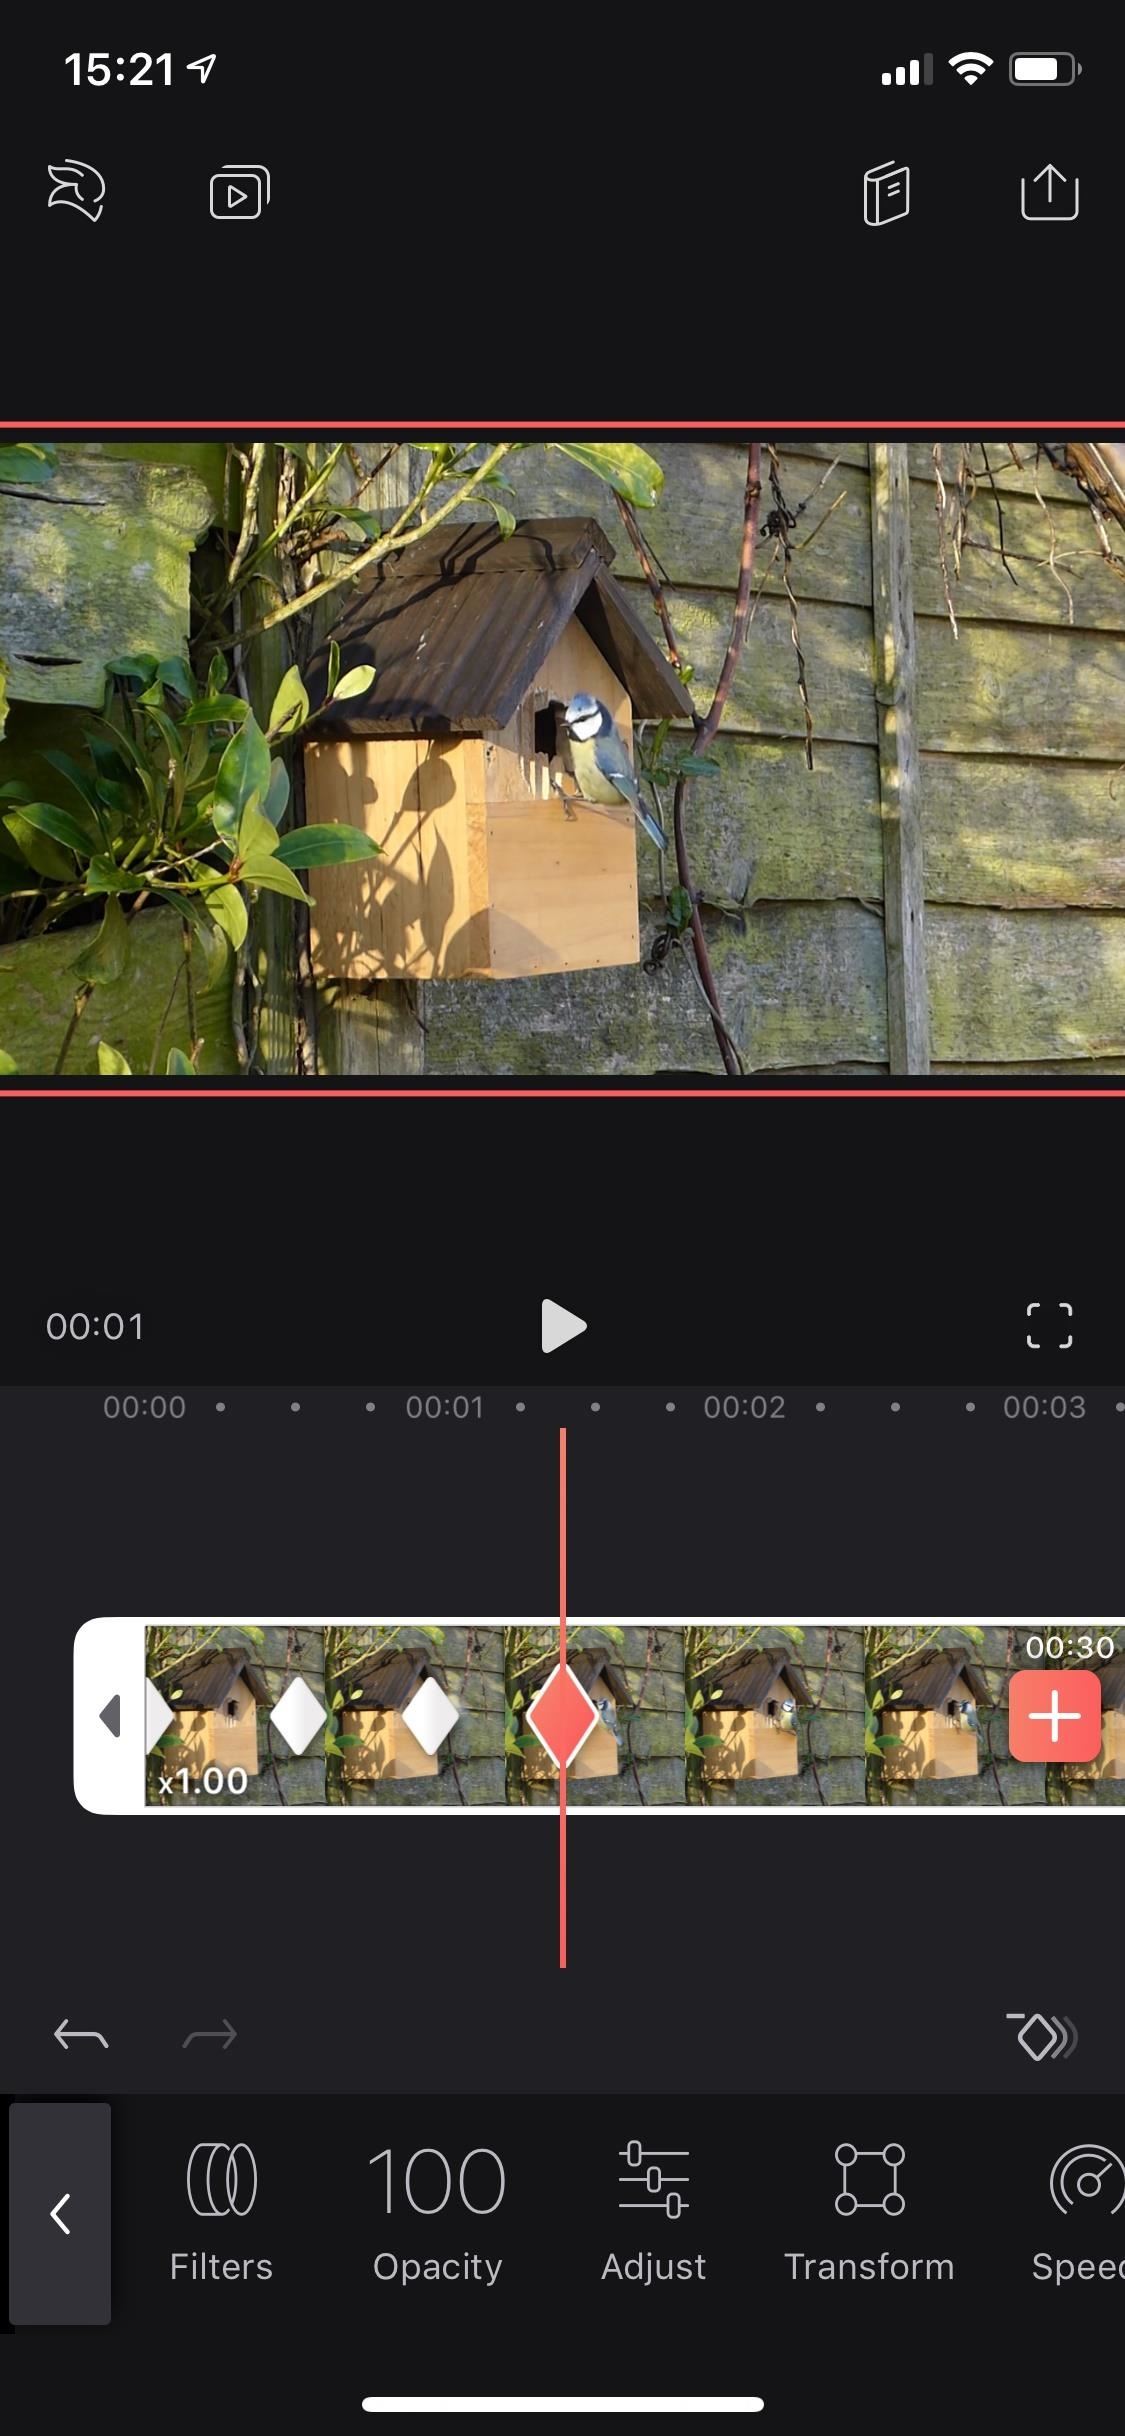
Move the playhead forward on the highlighted clip, and tap the keyframe icon to add another marker to your clip. If you only add a second keyframe, it will be the end of your animation or change. With this keyframe selected in the clip, you can make changes with any tool available. When you play the clip back, the video, audio, or photo will play as normal, then at the first keyframe, it will start transitioning to the effect you applied in the second keyframe, but it won't be fully realized until the playhead hits the second keyframe.
That's the basics of adding keyframes. Of course, you can have as many keyframes as you want for each keyframe sequenced, depending on how elaborate you want your animation or change to be throughout the clip.
If you want to get rid of a marker, tap on it, then the keyframe icon, which should now have a minus sign. You can also use the back tool (far left above the toolbar) if you make a mistake. Getting rid of a marker is important to know because there is no way to move a marker, but you can remove one and place a new one.
Additionally, as you'll soon see, you don't always have to add keyframe markers to the video clip manually. After you create one, move the playhead, then make a clip adjustment, a keyframe will automatically be added.


