Step 3
Animate Effects with Keyframes
Now that you know how to lay down keyframe markers, it's time to see how they work with effects. You can use keyframes to shift through filters, change opacity, make speed adjustments, use different color hues, move text around throughout your video, and change volume levels, to name just a few things.
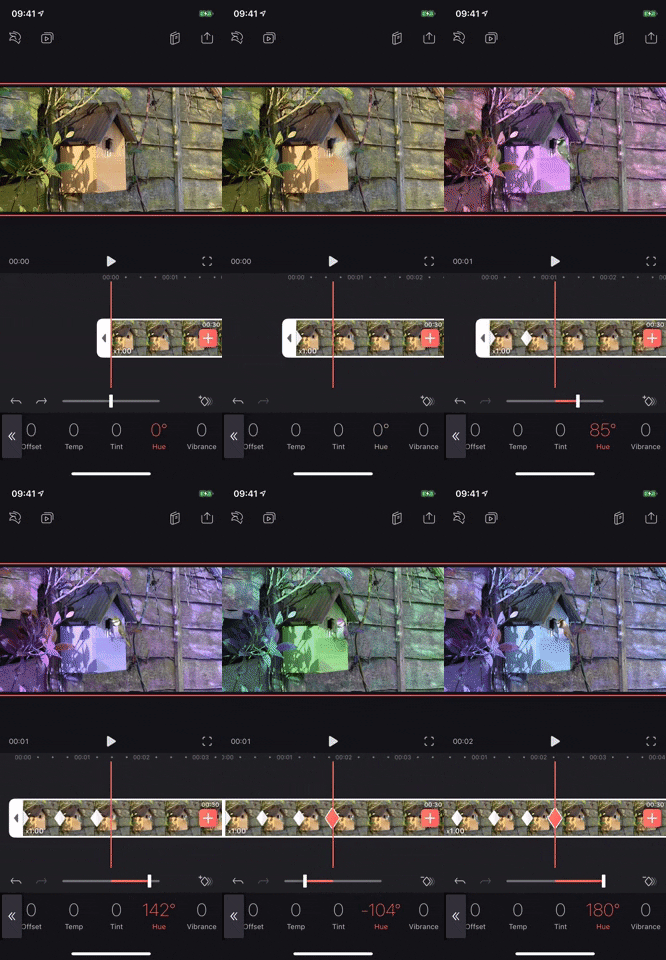
For this example, I'll be creating different color hues for specific parts of a video clip, but you can do this with effects for audio clips and photos. I'll also be starting from scratch, without any keyframes in the clip, so I can show you the other way to add additional keyframe markers.
Start by tapping the clip, then move the playhead to where you want the first keyframe marker, then tap the keyframe tool to add one. Next, with the clip still highlighted, move the playhead to where you want to next keyframe to be, but don't add one.
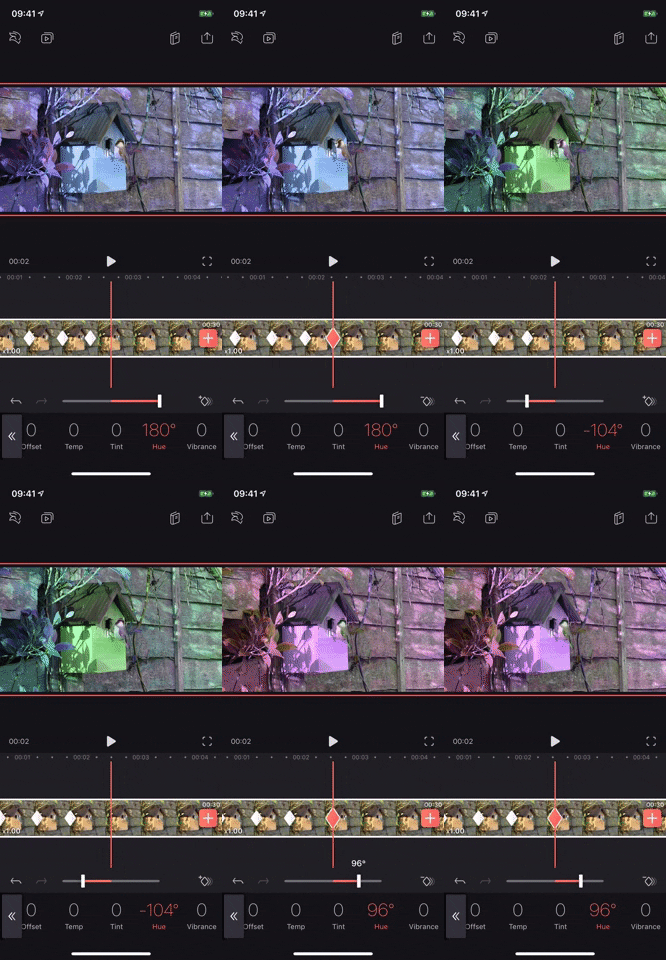
Since we're changing the hue in this example, tap on "Adjust" in the toolbar, then tap the "Hue" option. A slider will appear above the toolbar, so use that to adjust the hue to where you want it. As soon as it goes above or below zero, a new keyframe will automatically be added.
You can also set down markers in advance and change the hue after tapping on each one, but the automatic keyframe option feels more intuitive. Just know that you have options! You can keep moving the playhead down the clip to add more hues, thus, more keyframes, until you're satisfied. Use the erase keyframe icon or the back button to set up new markers if you make a mistake.
When you're finished adding keyframes, play the video to see if you like the effect. Videoleap will automatically create a transition for you between keyframes. The closer the markers are to each other, the faster the transition between effects; the farther away, the longer the transition takes. Play around with distance to see which transition you like best. Below is what my video looks like with several keyframes different hues.
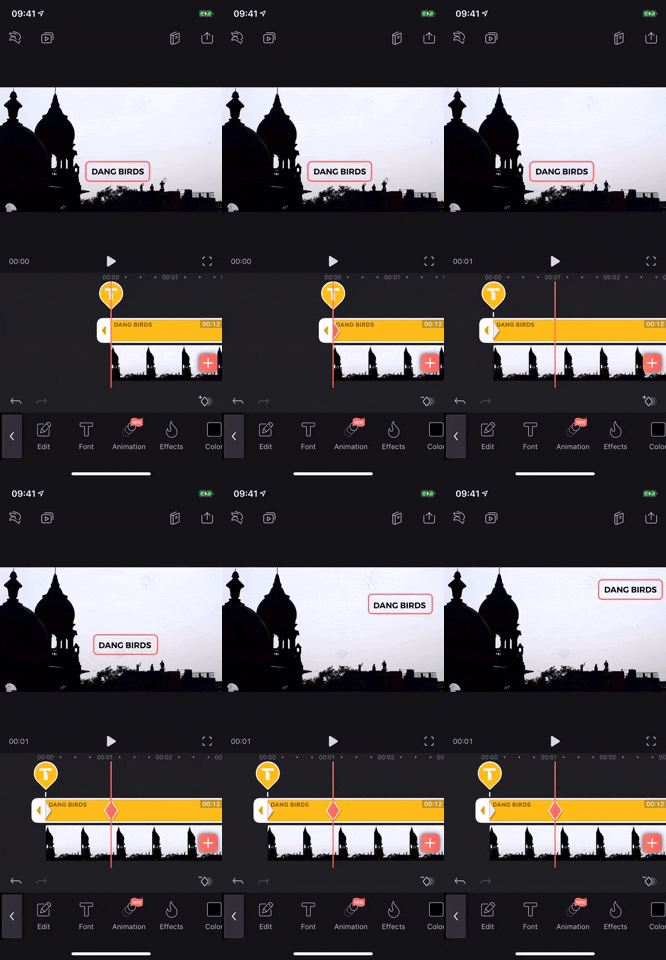
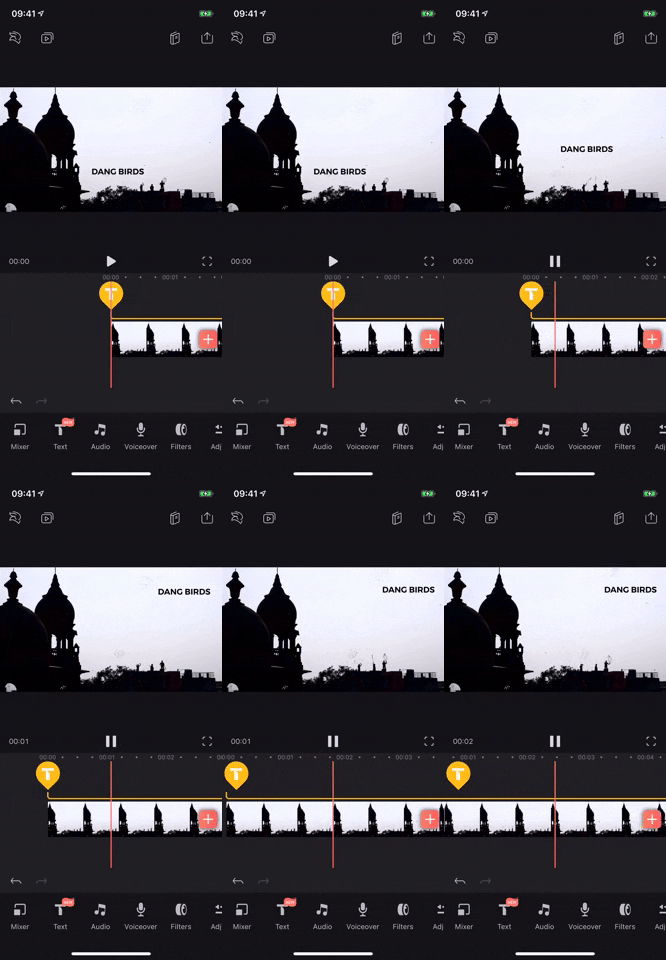
If you create keyframes for text and move the text around with your finger, the animation will be the path between the original placement and the new placement. For example, you can place text in the middle of the video, set down a keyframe marker, move up the timeline, and move the text to the top right to automatically set down another marker. During playback, you'll see the path animation of the text you moved.
Each editing tool reacts differently to keyframes, so playing around is the best way to see what the results will look like. This guide was just a starting point to get you going and finding ways to be creative with it.


